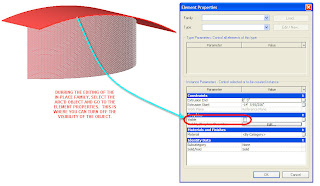
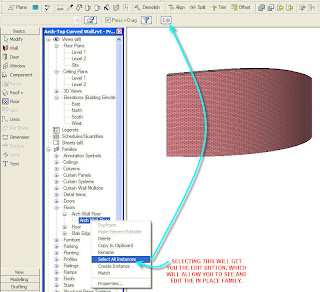
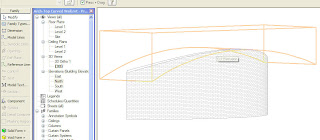
Well, that's one of the first things I did when I had a free moment to play around with it. Of course I could do an in-place wall, but I really didn't feel like modeling all the layers of a cavity wall. Then a little light bulb flashed around in-place elements...you can turn off their visibility. So, I created an in-place floor (could have been roof, ceiling, etc.) and gave it a unique name so I new what it was being used for. I then created a very thin extrusion for the floor shape and finished off the family. I kept it visible so I could attach the wall to the in-place floor. Once that was accomplished, I edited the in-place floor, went to the Element Properties and un-checked Visible. Finished the family and there it was...a curved wall with a curved top! The attached pics show turning off the visibility and how to actually edit the in-place object once it's turned off. In order to edit the "invisible" object, you can go to the Project Browser and use the Select all Instances.

Turning off Visibility off In-Place Family

Selecting the "Invisible" In-Place Family
Now, another method with in-place families would be to use an in-place family (I used a wall) and make it a Solid Void. Create the shape just like the other method above, except that you have to make sure the Void is tall enough to "cut" the height of the wall. Then you use the Cut Geometry Tool to make the Void cut the Wall and then finish the in-place family.

4 comments:
This is a great sharing.
However, could you tell me
how to determine your workplane
for the void ?
In my daily work, for such a wall
I always get the developed profile
of the wall shape in elevation,
just find it impossible to create
that void based on this true length
spline.
For this wall, I used a straight on elevation, so the workplane was easy to get. If your wall isn't aligned with an elevation, you can create a reference plane and use that as your workplane.
How do you attach a wall to a floor with that shape? The only options for the height of the wall are flat levels (1,2 etc.). To create the floor shape do you 1) Create floor in "Modeling" 2) Use a vertical ref plane 3) solid regular extrusion 4) finish massing? I am not good with massing and I am not sure if I am doing it right. When I create that shape it does not seem to be a floor- there isn't any indication that it is a floor in the element properties. Why is something simple like this so difficult in Revit? It seems like a "cheat" and I do not like to have those in my drawings because they usually end up creating problems further down the line. For example, will the floor that you create in this process be in the schedules even though its not really used? Thanks in advance and sorry for the lengthy question
Hi Dan...sorry for the delay on responding. To attach the wall, make sure you keep the in-place object visible, then use Attach (select wall, Attach in Options bar). Once you have it attached, and then edit the props of the in-place object to turn it off. As for the plane, you could create a ref. plane in plan, give it a name (in its props) so you can select it when you go to an elevation to make the extrusion. You can tell it's a floor by looking in your floor category in the project browser...the name you gave the in-place family will be listed under Floors.
Yes, this is basically a work-around (better than saying cheat) to get this shape, but that's what we have to do since Revit doesn't allow you to edit the profile of a curved wall. If we could do that, this trick wouldn't be necessary.
As for the schedule, yes it will show up by default. You would have to also do a little work-around. Since we can't Filter the schedule by the Type or Family name, folks are using something like the Type Comments to indicate this is a non-used element. Then, you can filter your schedule by elements that DO NOT include that comment.
If you need further help, use the Contact Me link and we can discuss through email.
Post a Comment